lesen Sie diesen Artikel in Deutsch
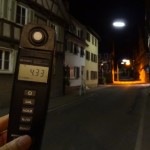
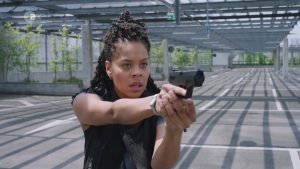
This camera test came about as the result of a scene I had to film for a popular German TV series. SOKO Stuttgart is one of the major German TV channel ZDF’s most popular crime dramas and is broadcast once at week at prime viewing time. One of the five scripts we had to shoot, „Null Schrot“ (Zero Calibre Shotgun Ammunition) opened with a chase scene. In this scene the victim is pursued through a picturesque wine-producing village and eventually shot at the edge of the town. The director, Gero Weinreuter, and I decided that the scene would be best shot using Steadicam. The shooting schedule only allowed one night to shoot the scene and as we were shooting at the end of June this effectively gave us only 5 hours of darkness. As we had neither the time nor budget to light the street using the conventional method of cranes, spotlights, additional generators and lighting technicians, I began looking for an alternative solution. What I needed was a particularly light sensitive camera, so that we could avoid a complex and time-consuming lighting plan for the streets, and my aim was to use as much of the existing lighting in the streets as possible. This consisted of street lights at about 10m high, fitted with neon tubes giving off quite a green light. This light only registered about 4 lux which is approximately half a foot-candle or the light of a candle two feet or half a metre away.
We were using the Arri Alexa with ProRes422 HQ LogC as our main camera in this production. This camera proved able to provide fantastic low-noise pictures at a basic sensitivity of ISO800 and in a large dynamic range. It also filmed pictures resembling those of a traditional film camera giving a true reproduction of colour as well as pleasant skin tones. In theory and based on the technical abilities of the Alexa we should have been able to film the sequence at ISO1600 with aperture set to F1.3. In practice, however, this made little sense. Even relatively wide-angled pictures taken with a 24mm lens don’t really appear to be in focus. In a wide shot of the village street, for example, only a few houses in the foreground would be in focus while those in the background would be fuzzy and out of focus, something which would be particularly obvious when filming historic timberframe houses. Or if you tried to focus on an actor in the foreground even just to shoot a medium shot the entire background would go fuzzy and out of focus and the viewer’s ability to orientate himself would become more and more difficult. This may have aesthetic advantages in certain situations and films, however, in a chase sequence it is not particularly desirable or helpful. Furthermore, when the victim, perpetrator and the steadicam cameraman have to move quickly the job of the camera assistant becomes more and more difficult. Only when the aperture is set to F2.8 or above is it possible to ensure pictures which will be in focus due to the increased depth of field. What I wanted to achieve in the camera test was to find out which camera we could use to film using an aperture of F2.8 and only the existing street lights. I wanted to find out if the pictures would be compatible with the Alexa both in quality and in colour and whether our post production team would be able to work on these pictures without any problems. A further criteria was that the camera should be equipped with a PL mount to allow us to use the Alexa’s set of lenses and wireless focus control system. I tested the Alexa and two further camera on location in Strümpfelbach: the Canon EOS C300 PL and the Sony PMW-F55. Both cameras were generously given to me for the tests by Stuttgart camera rental company, Licam.
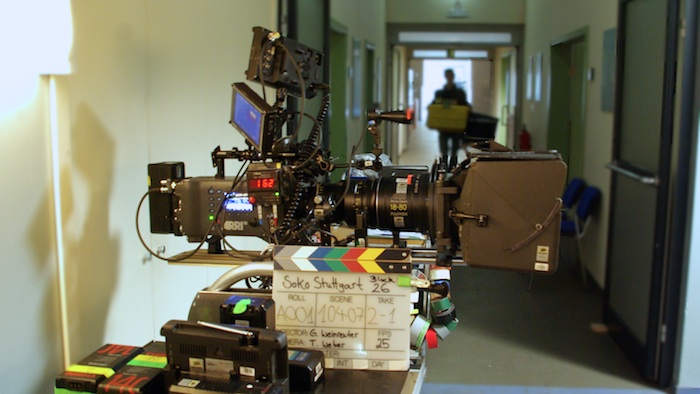
All the cameras were tested in the same location. As all were not available on the same day I had to do the test over two nights. Here I would like to thank Annette Reichmann and Jens Schlehe who acted as my camera assistants on one night each. Each individual shot begins with a clapperboard created using iPad-App MovieSlate and containing the following information: Date, Time, FPS, ISO, Aperture, Shutter speed, Colour Temperature, Lens Data. The next picture on the iPad shows a colour chart. MovieSlate can export the data saved on each clapperboard in different formats and can also show this in a table. All the pictures taken on the village street were taken with colour temperature set to 4500K as the lighting consisted primarily of neon lights. In addition to this some stray light came from some energy saving bulbs attached to the facade of a restaurant. In the background a zebra crossing was emitting some extremely orange-tinged light. All cameras were set so that they were optimally suited to SOKO Stuttgart’s post production process. The results would certainly have been better using RAW, 4444 or 4K, however, this was not relevant to our tests. Our test pictures were edited using Assimilate Scratch by SOKO Stuttgart’s assistant editor, Laurent Desmetz. He assimilated each take and added the corresponding aperture information, ISO, focus and of course details of which camera was used. The first clip shows the rushes exactly as taken by the camera. The same clip is then shown again but this time with an appropriate LUT (look up table) and our colour correction whereby we concentrated on achieving the best possible skin tones. Otherwise nothing else was altered: no noise suppression, no post-production focus adjustments or anything similar. All the clips were exported from Assimilate Scratch in DNxHD185 format onto one hard drive which I then used to work on the clips further at home on my MacBook. As each individual .mov file from each camera was up to 70 GB large, I had to compress them in order to upload them onto Vimeo (max upload per file is 5 GB). I did this with Quicktime Player 7 Pro at the following export settings: file format MP4, video format H.264, compressed at 20,000 kBit/s, frame rate 25, Keyframe every 25 frames, Profile limited to MAIN, Coding at best quality. By choosing these settings I hoped the have found the best compromise between the size of the file and the quality. The rushes from the C300 were especially long and I had to split them into two clips otherwise they would have been over the 5GB limit. It is of course also the case that Vimeo reproduces the clips at 720 pixels as standard and that they are further compressed in order to play smoothly over the internet. However, it is also possible to download my original file exactly as I uploaded it onto Vimeo. All the videos have no sound or commentary. Another way of gaining a quick comparison of the cameras is to study the frame grabs at the end of this article as well as the vimeo clips. The frame grabs are also discussed in detail.
Arri Alexa
Using the Alexa I filmed using the following settings in this order: ISO800 F1.3, ISO1600 F1.3, ISO3200 F1.3, ISO3200 F2. At the end of the clips you can find further night shots taken outside the village. The only lighting was a cigarette lighter. There is one camera set up at ISO1600 F1.3 and another at ISO3200 F1.3.
Canon C300
Using the C300 I filmed using the following settings in this order: ISO800 F1.3, ISO1600 F1.3, ISO3200 F1.3, ISO3200 F2, ISO6400 F1.3, ISO6400 F2, ISO12800 F1.3, ISO12800 F2, ISO12800 F2.8, ISO20000 F1.3, ISO20000 F2, ISO20000 F2.8, ISO20000 F4, ISO20000 F5.6.
I also shot a second series of pictures from a different standpoint using the following settings in this order: ISO3200 F1.3, ISO6400 F1.3, ISO12800 F1.3. You can see further night shots taken outside the village. The only lighting was a cigarette lighter.
Sony F55
With the F55 I filmed using the following settings in this order: ISO3200 F1.3, ISO3200 F2, ISO6400 F1.3, ISO6400 F2, ISO6400 F2.8, ISO10000 F1.3, ISO10000 F2, ISO10000 F2.8, ISO10000 F4. Camera settings during the test with the F55: XAVC HD 1920×1080, 422 10-bit, 50p, YPbPr, S-Log 2. Unfortunately I let the camera shoot using 50p instead of 25p. For this reason, assistant editor, Laurent Desmetz, had to remove every second frame in order to reformat it in Scratch to 25p. This process can be seen in the time code bottom right in the picture. In addition to this we also discovered after the test that the F55 has a noise suppression feature built in as standard (see PDF-Manual P45). Three settings are possible: low / medium / high. The default setting is medium. Following the advice of our post-production supervisor will changed the setting YPbPr to RGB during the shoot.
Summary and Conclusion
This clip is a summary of the best results from all three cameras including split screens showing two or four pictures simultaneously to allow a direct comparison of the pictures.
Although the Alexa set at ISO800 was by far the best of all three cameras, its performance at higher ISO settings was not so good. I think that the camera reached the limit of its capacity at ISO1600 and even at this setting the camera was already demonstrating higher colour noise than the C300 or F55 as can easily be seen from the frame grabs. Colour noise is a phenomenon which does not occur in reality and appears as distracting and artificial to a viewer. The picture gains an undesired additional effect which is not visible in the original: for example, the black night sky has pinpoints of colour. From a purely technical point of view we could have filmed with the Alexa, however, due to the reasons mentioned above regarding the very shallow depth of field this would not have been a wise choice.
The C300 gave astonishingly good results in low light. In my opinion the camera demonstrated no higher colour noise up to ISO6400 than the Alexa and that if necessary it would even be possible to go up to ISO12800. Although it has to be said that the colour reproduction, particularly the skin tones, are not so true to the original colours as with the Alexa and seem in general rather artificial and plastic. However, if one is prepared to compromise and accept these factors then it is possible to film using ISO 12800 and aperture F2.8. With the Canon clips the macro-block formation is much more pronounced and it is possible to see this more clearly due to the lower bit rate (50 Mbit/s) of the Codecs. This, of course, becomes even more obvious due to the additional compression by Vimeo. In addition to this the so-called OLPF flares (reflection through the Optical Low Pass Filters) of the cigarette lighter can be seen clearly. Quite simply, Arri appear to use a much better integrated filter.
The F55 gave best results of all in the tests. I find the colour noise here at ISO10000 lower than that of the C300 at ISO12800. Whether this is due to the internal camera noise suppression features or not I cannot say but this may be a possibility. The OLPF flares from passing car lights were also evident with the Sony. Even the original pictures straight from the camera appeared to have very true colours. The colour reproduction is good, the skin tones pleasing and there’s a rich black without colour artifacts. For these reasons we decided on the F55. A further argument for the F55 was that this camera was the only one of the three offering a global shutter. This was important to us as we wanted to incorporate flashes and muzzle fire into the sequence we were filming and avoid the risk of unwanted rolling shutter effects.
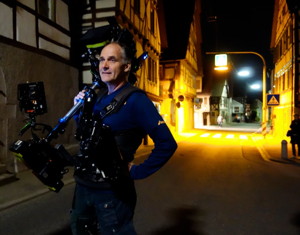
Various problems did crop up while we were filming at ISO10000 which is to be expected if you are using a new camera as a steadicam. A few alterations had to be made before the F55 functioned smoothly with all the peripheral equipment: monitor, wireless focus control system, Cine Measure Tape etc. Unfortunately, we didn’t manage to incorporate the HD wireless video transmission system, Teradek Bolt, which we had been using successfully on set during the previous 10 days. When we changed from YPbPr to RGB only one of the two SDI outputs still functioned, both had worked perfectly before. We needed at least two functioning SDI outputs, one to drive the HD wireless video transmission system and another one for the steadicam operator’s control monitor. The fact that only one SDI output functions when the setting is changed from YPbPr to RGB is not mentioned in the instruction manual. Sony’s German help desk eventually confirmed that none of the equipment was at fault and that this did indeed appear to be the case. Unfortunately, we couldn’t access this information during the night when we were filming, which would have saved us some valuable time. It could be two monitors would function but we proved that when one SDI output is connected to Teradek Bolt only one SDI output functions.
We did not have an SDI Splitter and weren’t able to solve the problem using a BNC Coaxial T-Adapter although that normally works with the Alexa. I therefore decided to forget about the HD wireless video transmission system and to depend wholly on the steadicam operator’s control monitor. We would otherwise have lost even more valuable time and would not have been able to complete the filming schedule for the night. At this point I was thoroughly relieved that I had done the camera tests previously and that I knew that the lighting would be right at ISO 10000 and aperture F2.8. Using the steadicam monitor to check the quality of the lighting in the filmed pictures was not possible as the monitor was being used to check completely different criteria. Apart from a Zebra system, which required some getting used to, the F55 unfortunately doesn’t have such a good exposure metering control as the Alexa.
Any attempt to look for False Colour or Histogramm will not be successful as these are not integrated. We can only hope that Sony will bring out a firmware update. In spite of all this the use of the F55 was a success. It would never have been possible to film the scene as it was described in the script without the F55 or only possible at considerable extra cost. This new extremely light-sensitive camera allowed us great flexibility while filming and in spite of the initial problems we actually managed to film some more camera set-ups in addition to those originally scheduled. I want to stress at this point that I am not saying that it is no longer necessary to use professional film lighting for shooting at night. Atmospheric lighting is one of the most important creative mediums of a cameraman and to give up using this just because a new extremely light sensitive camera is now available is not an option for me.
Framegrabs
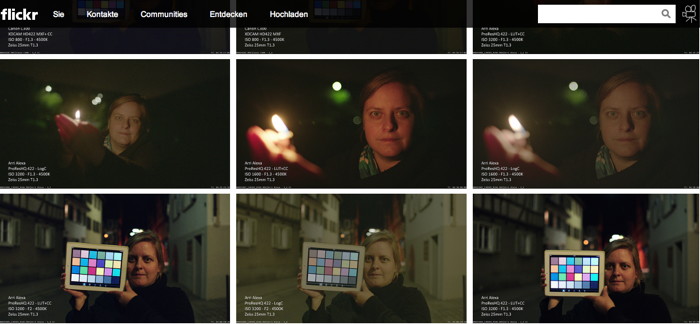
I created the 68 Framegrabs from the DNxHD185 data with the help of the programme MPLayerX. All of these are freely available on Flickr and allow a quick and direct comparison of the individual pictures in the best possible quality. The Framegrabs are 1920 x 1080 pixels and about 4 MB each in size. Alternatively, all Framegrabs can be downloaded in a single .zip file of about 234 MB in size‚ from my Dropbox. More photos from the low light camera test and the actual shoot can be found here on Flickr.
Special thanks to:
Licam GmbH, Bernd Schmidt and his team
Laurent Desmetz, Post-produktion assistant editor for Soko Stuttgart
Annette Reichmann, Camera Assistant during the Alexa & C300 camera tests
Jens Schlehe, Camera Assistant during the F55 camera test
Kathleen Hogarth, English Translation
and Felix, Hans & Simon for reading the article and making various helpful comments & suggestions
SOKO Stuttgart Film Crew:
Thomas Ch. Weber, Cinematographer
Kai Fink, Steadicam Operator
Bettina Staudinger, Camera Assistent
Petra Lisson, Clapper Loader & DIT
Christian Belz, Video Operator
Gregor Frenzel, Dolly Grip
Hendrick Sauer, Grip Assistant
Peter Schöllhorn, Gaffer
Bernhard Haug, Lighting Technician
Felix Kienzler, Lighting Technician
Jonathan Heidrich, Assistant Lighting Technician
Patrizio Guerra, Assistant Lighting Technician
Waheed Zamani, Post-produktion Supervisor
Cameras tested:
Arri Alexa, ISO: 800, 1600, 3200
Canon EOS C300 PL, ISO: 800, 1600, 3200, 6400, 12800
Sony PMW-F55, ISO: 3200, 6400, 10000
Lens: Zeiss HS 25mm T1.3
Clapperboard: www.movie-slate.com
Camera setting during actual SOKO Stuttgart shooting:
average light intensity during shooting: approx 4 Lux
camera settings during shooting with the F55: XAVC HD 1920×1080, 422 10-bit, 25p, RGB, S-Log 2
ISO: 10.000, throughout
Aperture: F 2 bis 5.6
Frame rate: 25 fps & 50 fps
Lens: Zeiss UltraPrime Distagon 24mm T 1.9 and Zeiss UltraPrime Distagon 40mm T 1.9
Lighting during shooting:
Street lights with neon tubes, approx 10m high
LED LitePanel 1×1 with V-Mount batteries
500W Arri fresnel, dimmed
800W Janiro Red-Head, dimmed
1000W Arri fresnel, dimmed
2000W Arri fresnel, dimmed, with lightning shutter for muzzle fire light effect




13 Antworten
How can one use iPad in place of a colour chart? Isn’t iPad a colour source? Aren’t you measuring the emitted light from it then the light available to the camera in the set?
I don’t get it…
Hi there,
you are, of course, completely right, the iPad is indeed a source of light. This was one of my mistakes. A change in our shooting schedule meant the night I had planned was no longer feasible and a change in the weather forecast mean the test could either be done the very same day or not at all. Unfortunately, the ensuing rush left me with no time to organise getting a Colour Chart. Using the iPad was an emergency solution to allow us to go ahead at all.
This test was carried out while I was actually in the middle of filming the series and obviously doesn’t have the exactness of a well-planned studio test in a controlled environment like for example the Zacuto camera shootouts. However, I’ve tried to be open about my mistakes so that not only I but others can learn from them. Thanks for your comment, well worth pointing this out.
cheers
Thomas
Great testing and interesting results. It might have been interesting to test the F55 in 4k mode down-rezzed to HD and observe any color noise, etc..
I agree about lack of exposure tools on F55, this should have been 1st thing to release post initial sales. Here we are in almost August now without anything, or monitoring LUTs if you plan to shoot SLOG2.
Its also too about the SDI output issues, these also need to be addressed.
http://www.hingsberg.com
Hi there,
Thank you for your comment. We are all looking forward to better exposure tools in next firmware update.
Like your blog
cheers
Thomas
this blog article has been shared here:
http://www.scoop.it/t/videodrome
I’ve posted your tests on the Sony 35mm Facebook page http://www.facebook.com/SonySuper35mm
this blog article is also discussed here:
http://www.dvxuser.com/V6/showthread.php?310923-F55-C300-Alexa-Low-light-test
Thank you so much for publishing your test. Very usefull.
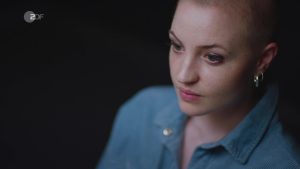
Are those noises on the street floor due to compression ? I found them as well as those on the girl’s dark blouse quite unpleasant.
Best,
Phil
Thank you Philipe for posting your comment. I´m not sure if I understand what shot exactly are you referring to. Would you please specify type of camera, ISO and aperture so I can look it up and reply.
It is of course also the case that Vimeo reproduces the clips at 720 pixels as standard and that they are further compressed in order to play smoothly over the internet. However, it is also possible to download my original file exactly as I uploaded it onto Vimeo. I´m not sure but think you might to have your own (free) account with vimeo.
cheers
Thomas
Thomas, I noticed those moving noises in all your frames. But with the canon C 300 it was just too strong.
I am actually downloading the Framegrabs to compare. It will take a few hours to complete download, so I posted you first the question.
Thanks,
Phil
I noticed the ’noise suppression‘ in the Sony F55 as a bad thing.
When you pan fast left to look down the dark alley, bright points leave ghostly trails behind them !
In CCTV Security Cameras, this is known as „3D noise reduction“.
As well as averaging neighbouring pixels in the same frame, it also averages the same pixel in earlier frames !
Was it not noticeable in the final result, or did you turn it down/off ?
Hello Eric,
thanks for your comment
At the time I made this test I simply didn´t know that the nois reduction was on
cheers
Thomas